Configurable Options
Configurable options are a powerfull feature which lets your client customize their product. You can create configurable options for any product.
How to create a configurable option
In this guide we’ll create a configurable option for a Pterodactyl server. The configurable option will allow the client to select the type of server they want to order.
Step 1: Create the configurable option
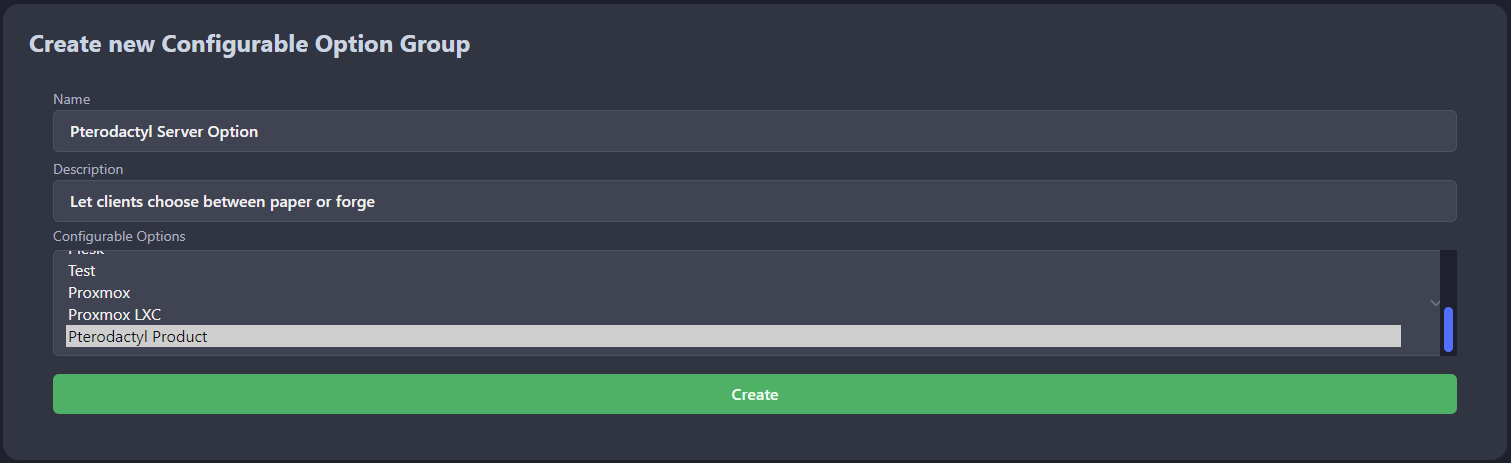
First we need to create the configurable option. Go to the admin panel and navigate to Configurable Options and click on Create Configurable Option Group.
Example
Step 2: Create the options
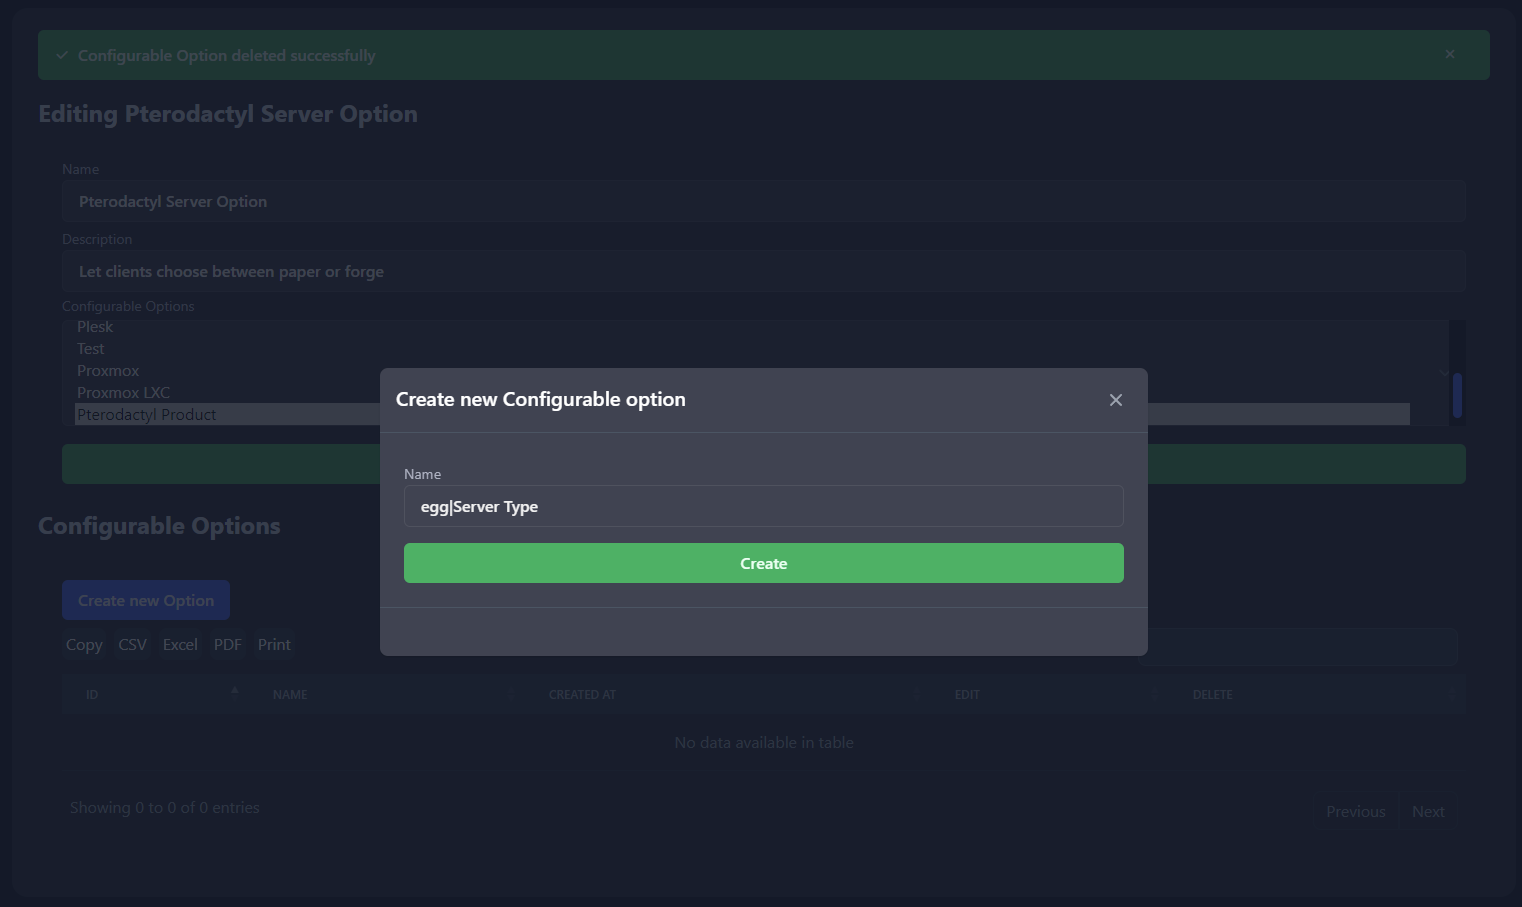
Now we need to create the options for the configurable option. Click on Create new option and fill in the name.
It is important to set the name to egg| <Your Display Name> this is important for pterodactyl to know what variable to use.
For a full list of names checkout the pterodactyl guide
Example
Step 3: Making inputs
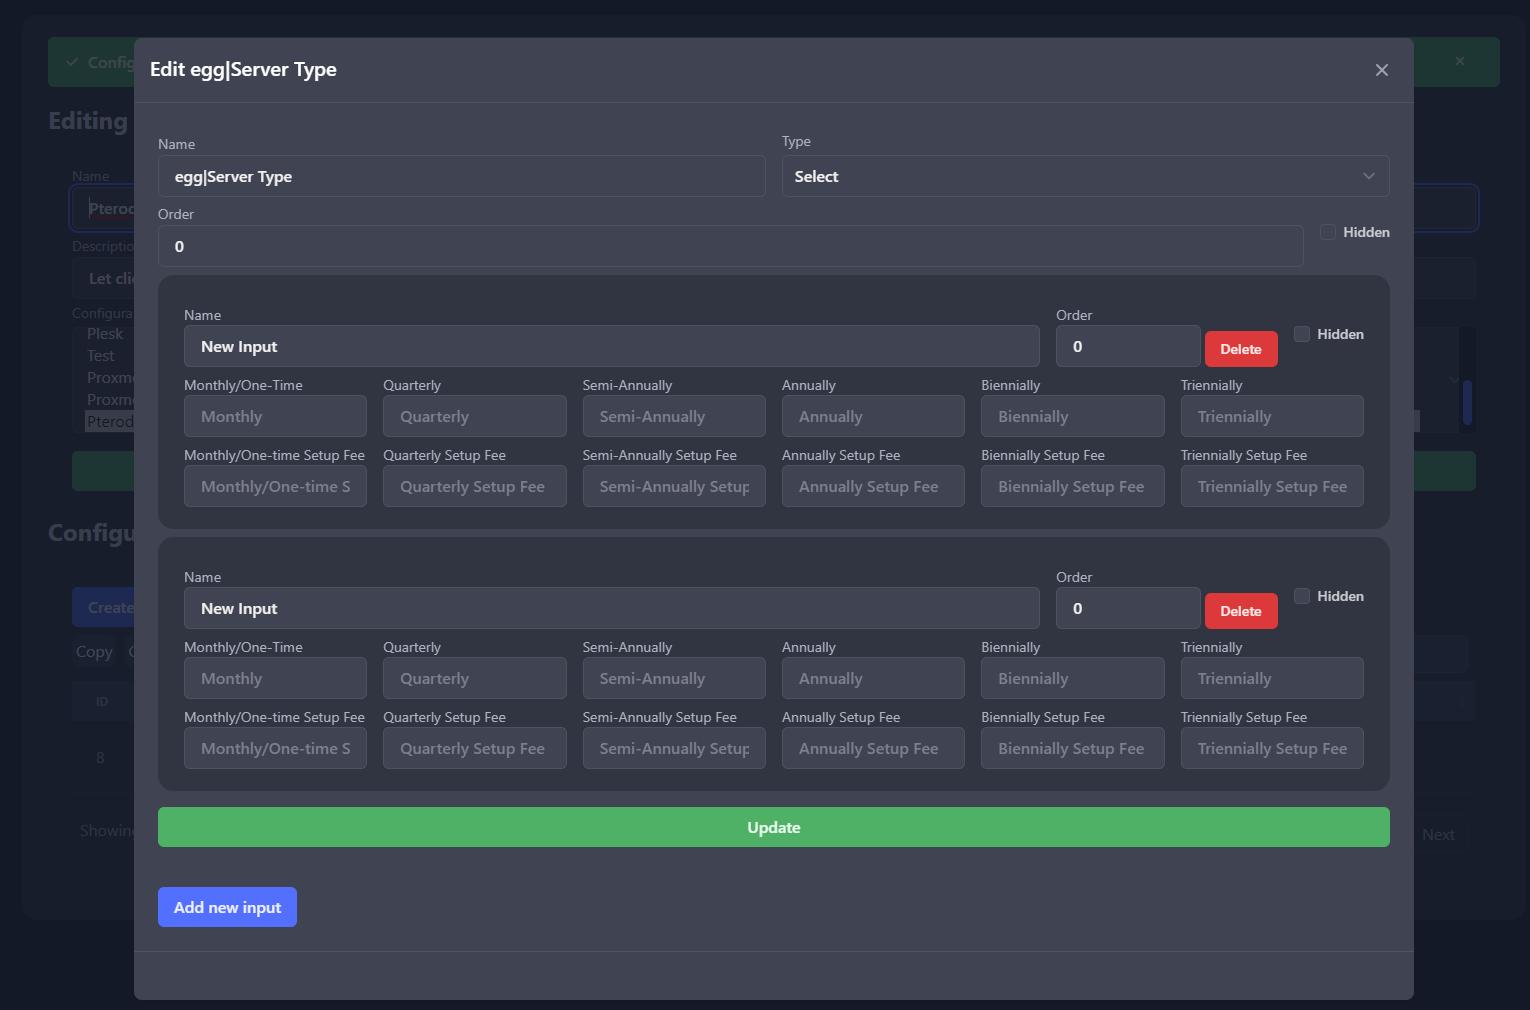
Now we need to create the inputs for the configurable option. Click on Create new input.
We want a input for Forge and Paper. So we need to create 2 inputs.
Example
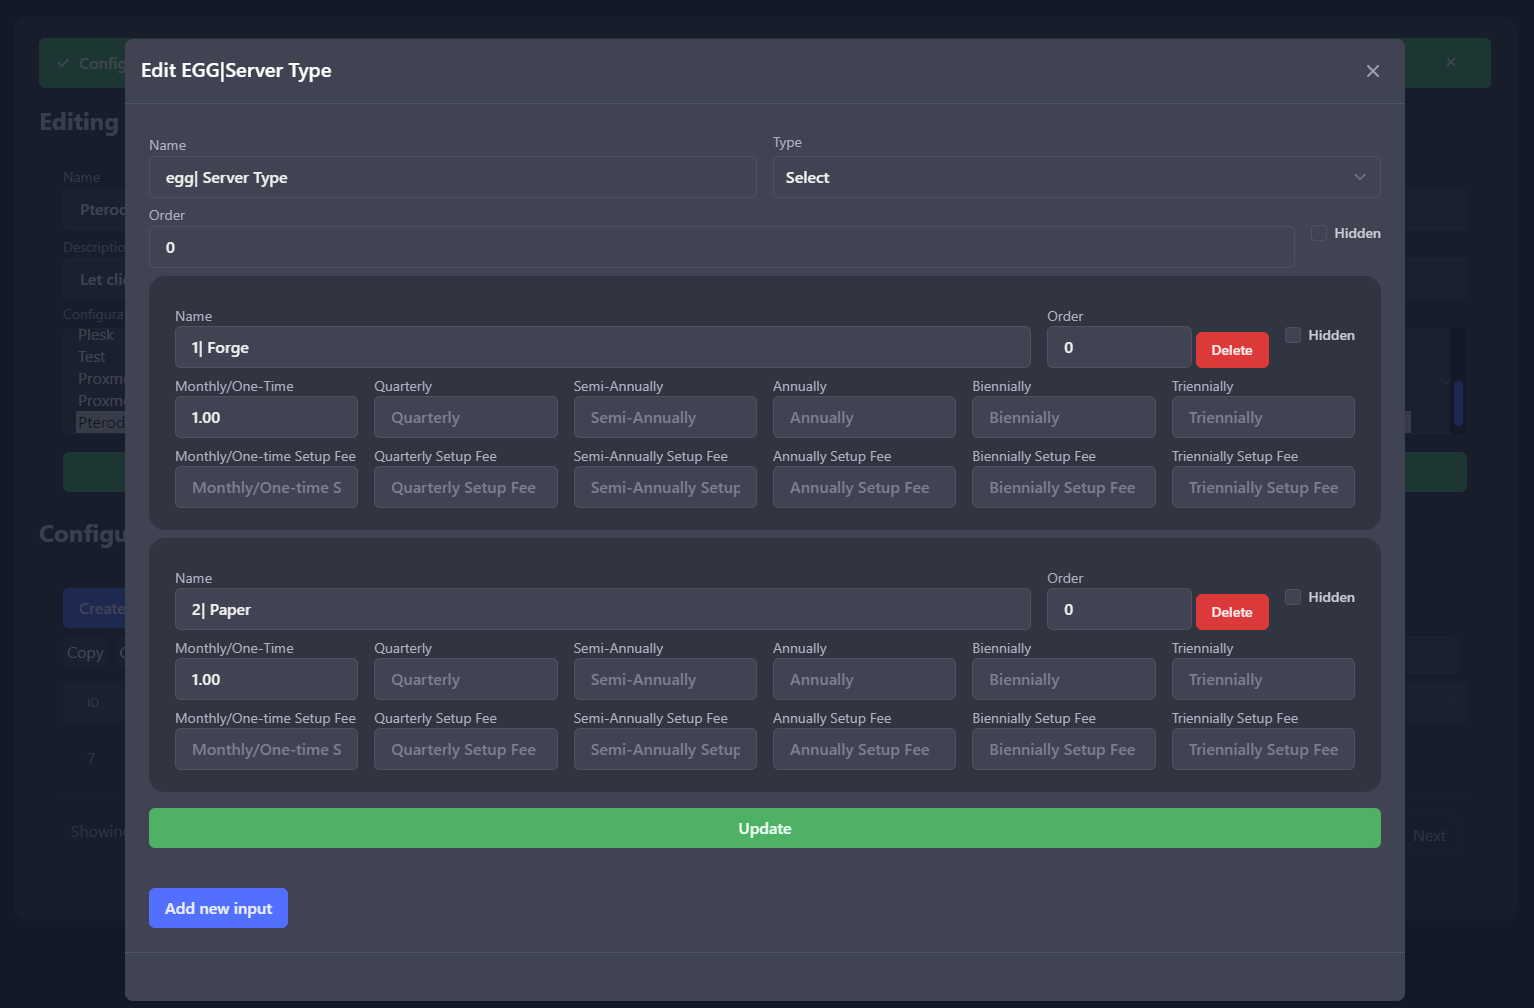
Step 4: Updating the names and prices
Configurable inputs have a name and a price. The name follows the same rules as the name of the configurable option.
So in my case paper has a id of 1 and forge has a id of 2.
The name of the input should be <ID> | <Your Display Name>
Example