Config Options
Config options are a powerful feature which allow your customer to customise their product. You can create config options for any product.
How to Create a Config Option
In this guide we'll create a config option for a Pterodactyl server. The config option will allow the customer to select the type of server they want to order.
1: Create the Config Option
First, we need to create a category for the configuration and select the products we want to offer the choices upon checkout. We do this by filling in the following form:
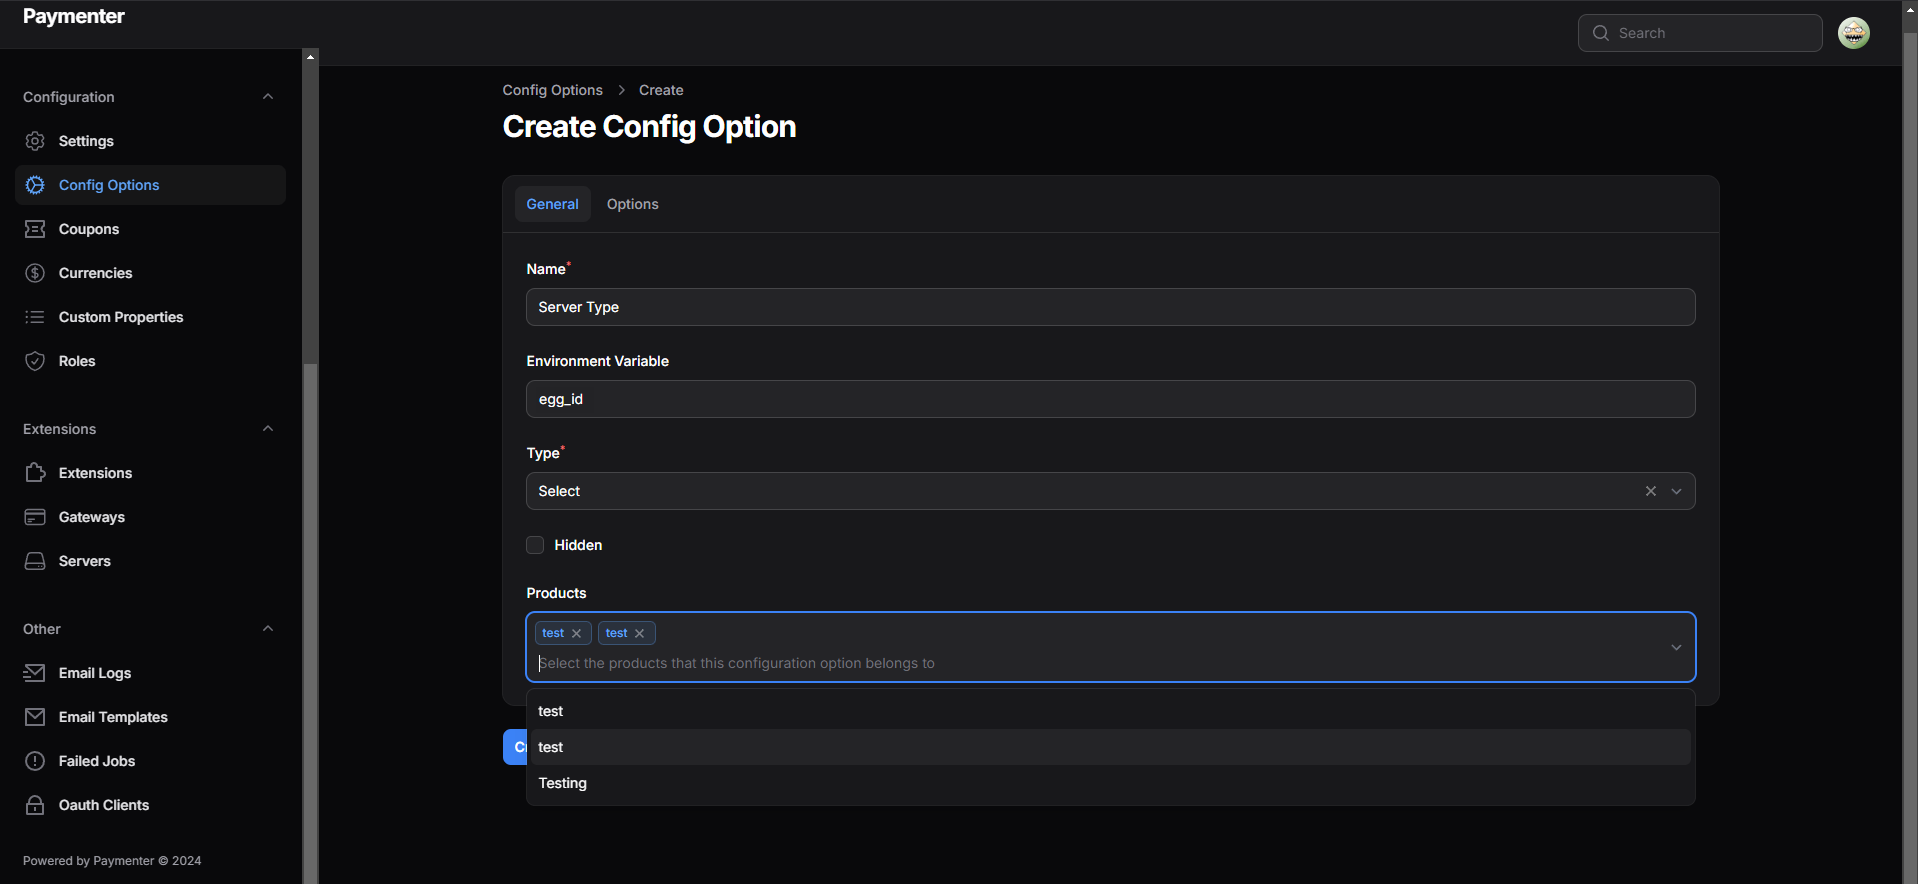
It is important to set the Name to what you want to be displayed to your customers. In the example, we have chosen for Server Type
Now, we need to provide a property that we want to change. In the example, we have chosen egg_id For a full list of names, see the Pterodactyl guide
2: Making Inputs
Now we need to create the inputs for the config option. Click on Options. In the example, we want an option for Paper. Click on Add Option and fill in the form. The Name variable is once again what is shown to your customer upon reaching the config options window! The Environment Variable is used to overwrite server setting variables, in this case, the egg ID.
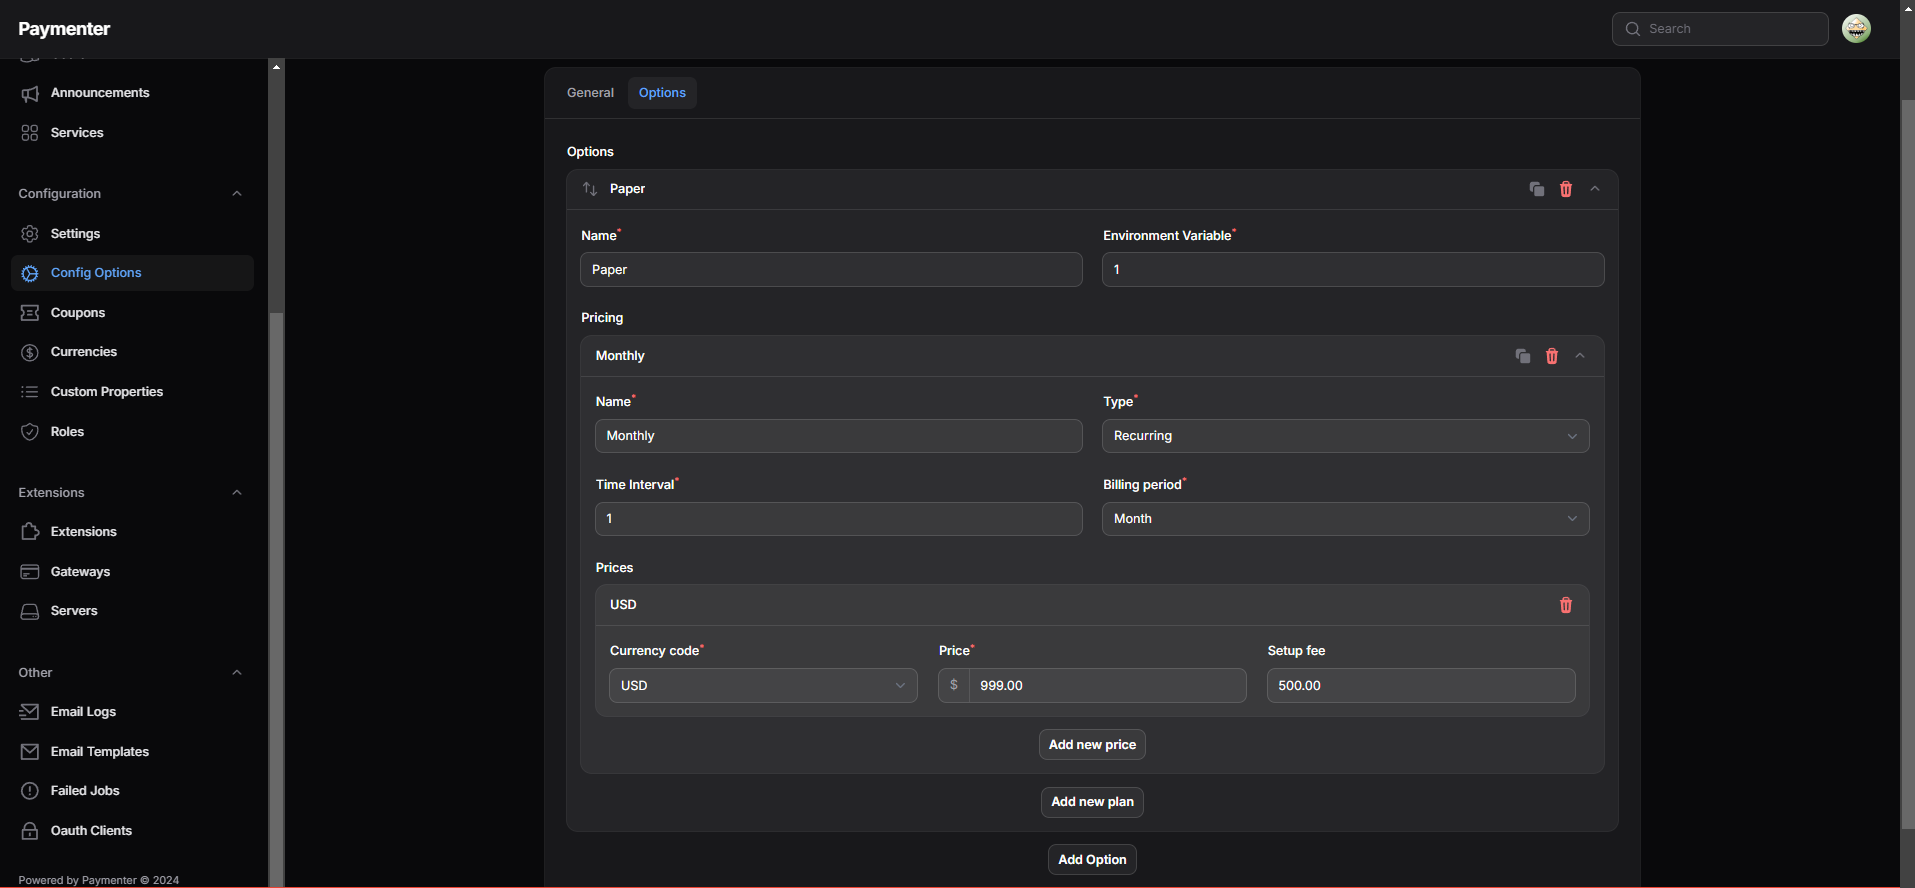
3: Updating Pricing
In case we want to add an additional charge for the config option, you can click on pricing to extend the window. Here you can set a Name, which is shown to your customer. Examples of this could be: Free, Monthly, Yearly In the same window, you can choose between a several options, (e.g Free, Recurring and One Time.) When selecting Recurring, multiple variables pop such as "Time Interval" appear. This is the amount of Days, Weeks, Months or Years that should go by before charging the user again, which is chosen in the Billing Period box.