Convoy
Overview
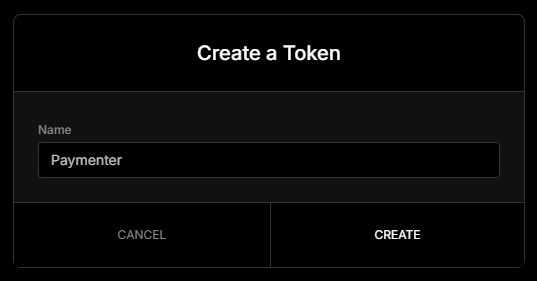
Create a API key in Convoy
Create an API key in the Convoy panel. Give it a name like "Paymenter" and press the Create button.
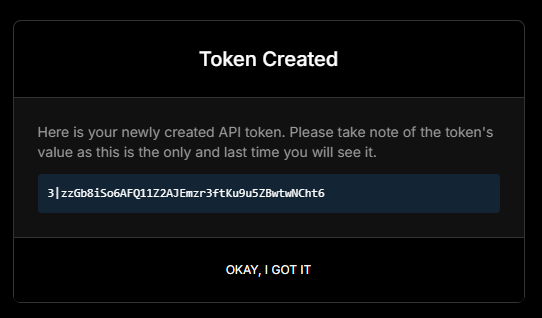
Copy the key and save it somewhere safe, you will need it later.
Configure Paymenter
Insert your API key and your Convoy URL in the Paymenter admin panel.
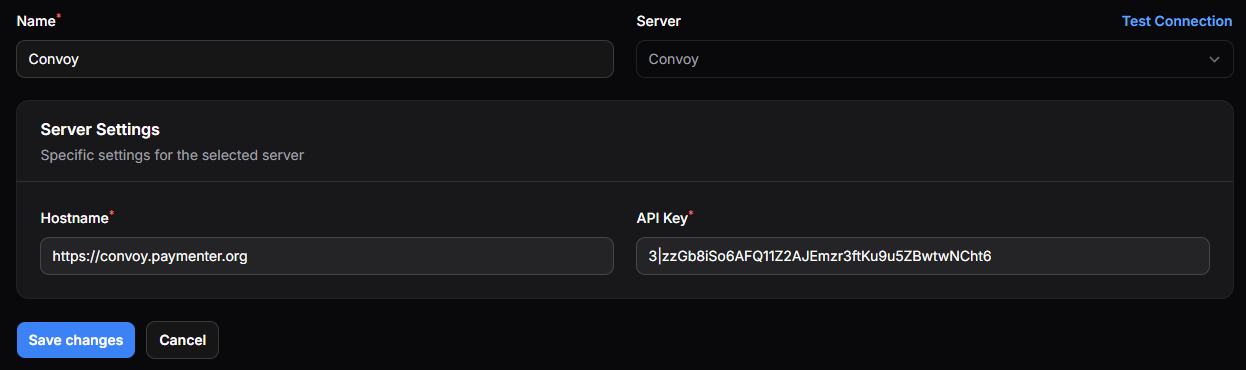
Press Test Connection to see if the connection is working.
Configuring the product
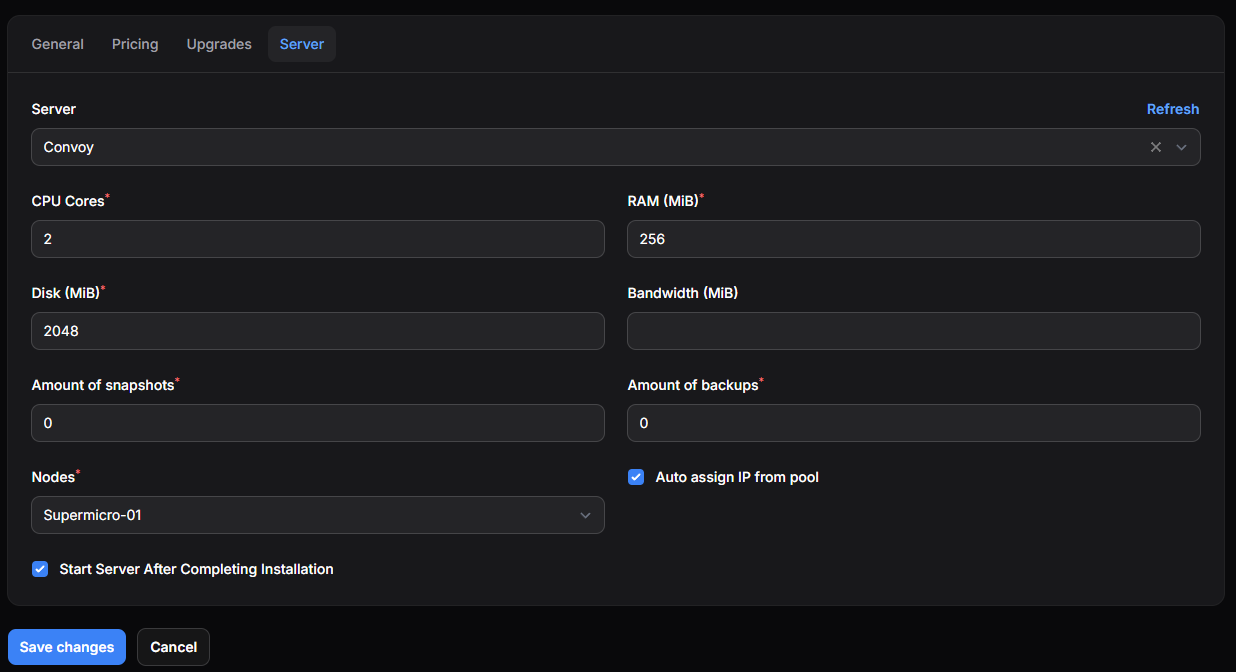
After you have created a product you need to go to the settings
Fill in the product details and select the server you want to assign to the product
Below you will see a fully functional example of a Product
Sending the IP and Password via Email
You can send the IP and Password to the customer via email. Fill in the email template in the product settings.
Here is a example of a email template:
blade
@isset($server['limits']['addresses']['ipv4'][0]['address'])
- IP Address: {{ $server['limits']['addresses']['ipv4'][0]['address'] }}
@endisset
- Root password: {{ $password }}